
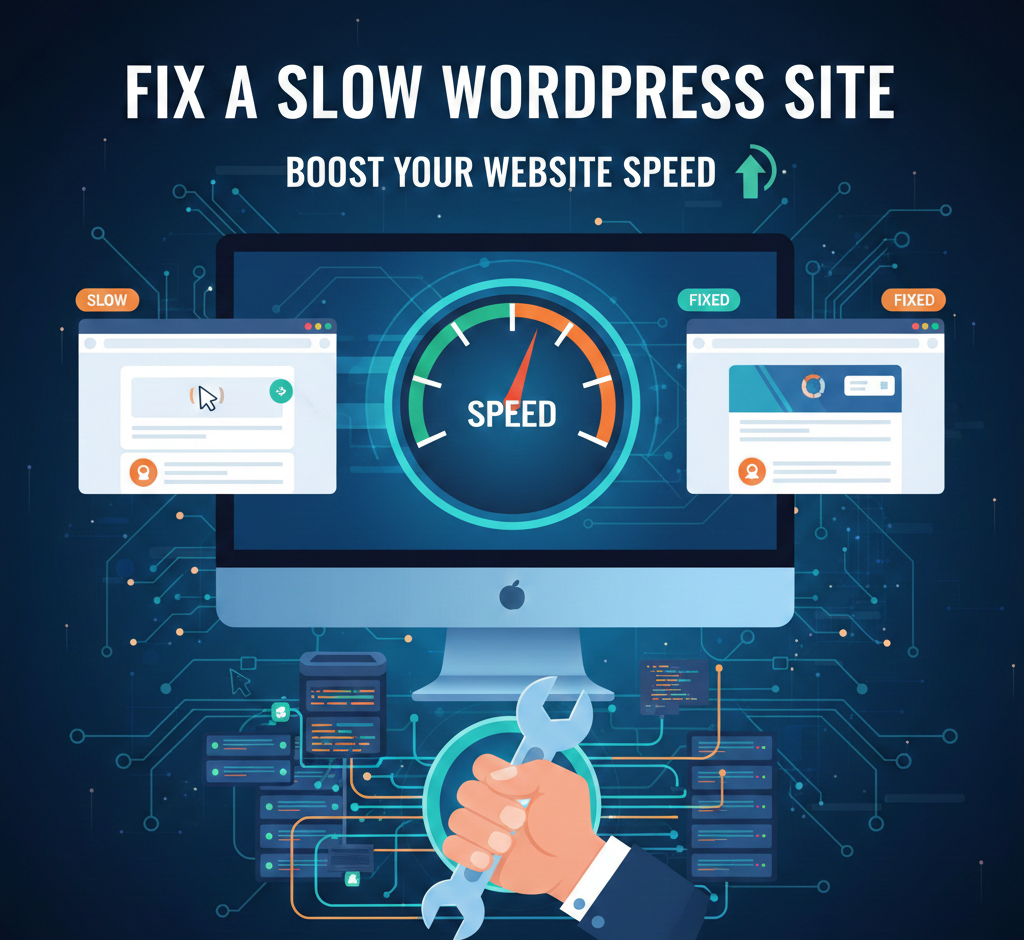
The pervasive issue of slow loading times on WordPress sites severely impacts user engagement and SEO, making it crucial to fix slow WordPress performance beyond conventional wisdom. A truly performant WordPress instance requires a meticulous dissection of its entire delivery chain, from server-side resource allocation and database query optimization to intricate front-end rendering mechanics. We’ll explore the often-overlooked interplay between modern browser parsing, the critical rendering path. the efficiency of asset delivery, revealing how even seemingly minor configuration oversights can cumulatively degrade Core Web Vitals. This journey moves past generic plugin recommendations, diving into the architectural nuances and measurable impacts that define true website velocity.

Understanding the Core Problem: Why WordPress Performance Deteriorates
Many WordPress site owners grapple with diminishing site speed over time, often leading to frustration and significant drops in user engagement and search engine rankings. To effectively fix slow WordPress issues, it’s crucial to comprehend the underlying mechanisms that contribute to this degradation. A slow WordPress site isn’t usually the result of a single flaw but rather a culmination of performance bottlenecks across several layers: the server, the database, the PHP application. the client-side rendering.
WordPress generates pages dynamically using PHP and database queries. Slow queries increase TTFB, while large images or blocking CSS/JS damage Core Web Vitals (LCP, FID, CLS). Missing Google thresholds (LCP <2.5s, FID <100ms, CLS <0.1) hurts SEO and raises bounce rates.
Common culprits include excessive plugin usage, which can introduce numerous database queries and external script calls; unoptimized images that consume vast bandwidth; inefficient themes with bloated code; inadequate server resources (especially on shared hosting); and a lack of proper caching. Each added component, while potentially beneficial, adds overhead to the PHP execution time and database load. Understanding these intricate interactions is the first step towards implementing targeted, effective solutions rather than merely applying superficial fixes.
Diagnosing Performance Bottlenecks: The First Step to Fix Slow WordPress
Before implementing any optimizations, accurately diagnosing the root causes of a slow WordPress site is paramount. Without proper diagnosis, efforts can be misdirected, leading to negligible improvements or even new issues. This involves establishing a baseline and meticulously analyzing various performance metrics using specialized tools. Our primary goal here is to identify exactly where the delays are occurring, whether server-side, network-related, or client-side.
A suite of robust tools is available for this purpose. Google’s PageSpeed Insights (PSI) and Lighthouse, integrated into Chrome DevTools, provide comprehensive audits covering performance, accessibility, SEO. best practices. PSI gives a performance score (0-100) and highlights key Core Web Vitals metrics like LCP, FID. CLS, along with actionable recommendations. For instance, a PSI score below 50 often indicates significant issues. GTmetrix and WebPageTest offer even more granular detail, including waterfall charts that visualize the loading sequence of every resource (HTML, CSS, JS, images). These charts are invaluable for identifying render-blocking resources, slow external scripts. large file sizes. WebPageTest, in particular, allows testing from various global locations and connection speeds, providing a more realistic view of user experience across different demographics.
On the server-side, the Time To First Byte (TTFB) is a critical metric often overlooked by client-side tools. A high TTFB (e. g. , above 600ms) suggests issues with server response time, database queries, or inefficient PHP processing. Tools like Query Monitor, a free WordPress plugin, are indispensable for pinpointing internal bottlenecks. It displays database queries, PHP errors, HTTP API calls. hooks fired, along with their execution times directly in the WordPress admin bar. For example, if Query Monitor reveals a specific database query taking 200ms on every page load, it immediately flags that query for optimization. Moreover, server logs (Apache access/error logs, Nginx logs) can reveal excessive resource consumption, bot activity, or application errors contributing to slow responses. Establishing a measurement methodology—test, implement one change, re-test, assess—is crucial to isolate the impact of each optimization and avoid introducing new regressions.
Server-Side Optimization: The Foundation of Speed
The server environment forms the bedrock of your WordPress site’s performance. Optimizing this layer can yield the most significant improvements in TTFB and overall responsiveness, directly addressing challenges to fix slow WordPress at its core. Merely tweaking client-side assets won’t compensate for a sluggish server.
The choice of hosting provider and plan is paramount. Shared hosting, while economical, often allocates minimal CPU and RAM resources, leading to performance degradation under moderate traffic. Upgrading to a Virtual Private Server (VPS), dedicated server, or managed WordPress hosting (e. g. , Kinsta, WP Engine, SiteGround’s higher tiers) provides dedicated resources and optimized environments. Managed hosts often include server-level caching (Nginx FastCGI, Varnish), object caching (Redis/Memcached). Content Delivery Network (CDN) integration as standard, drastically reducing TTFB. For instance, a typical shared hosting TTFB might be 800ms, whereas a well-configured managed WordPress host can achieve 100-200ms.
PHP version is another critical factor. WordPress benefits immensely from newer PHP versions. PHP 8. x (8. 1, 8. 2, 8. 3) offers substantial performance improvements over older versions like PHP 7. 4. Benchmarks consistently show PHP 8. x executing requests 10-20% faster, consuming less memory. handling more requests per second. Upgrading PHP should be a priority. always test compatibility with your theme and plugins in a staging environment first. You can usually change the PHP version via your hosting control panel (e. g. , cPanel, Plesk).
# Example of checking PHP version via SSH
php -v
Database optimization is equally vital. WordPress relies heavily on its MySQL/MariaDB database. Over time, the database can become bloated with post revisions, spam comments, transient options. orphaned data. Regular cleaning and optimization are essential. Ensure your database tables use the InnoDB storage engine, which generally offers better performance, crash recovery. row-level locking compared to MyISAM, especially for high-traffic sites. Analyzing and optimizing indexes can also dramatically speed up query execution. For example, a slow query might take 500ms without an index but drop to 50ms with one. Many hosting providers offer tools like phpMyAdmin for database management, where you can run OPTIMIZE TABLE commands. But, more advanced analysis, such as identifying slow queries using MySQL’s slow query log, might require server access or a capable database administrator.
Implementing Advanced Caching Strategies: Beyond Basic Plugins
Caching is arguably the most impactful optimization for a slow WordPress site, transforming dynamic content requests into static, rapidly served files. While basic caching plugins are a good start, a truly optimized WordPress site leverages a multi-layered caching strategy that goes far beyond simple page caching.
This is the most common form, where the server stores a static HTML version of your dynamically generated WordPress pages. When a user requests a page, the cached HTML is served directly, bypassing PHP execution and database queries entirely. This drastically reduces TTFB and server load. WordPress caching plugins like WP Rocket, LiteSpeed Cache. W3 Total Cache excel here. For instance, WP Rocket can reduce page load times by 50-70% on average, particularly for anonymous users. But, aggressive page caching can lead to stale content, especially on e-commerce sites or membership areas. Smart cache invalidation (e. g. , clearing cache for a post when it’s updated) and exclusion rules for dynamic pages (e. g. , cart, checkout, user accounts) are critical. On high-traffic sites, server-level page caching (e. g. , Nginx FastCGI Cache, Varnish Cache) can outperform plugin-based solutions by serving cached content before WordPress even loads, offering superior speed and scalability.
# Example Nginx FastCGI Cache configuration snippet
fastcgi_cache_path /var/run/nginx-cache levels=1:2 keys_zone=WORDPRESS:100m inactive=60m;
fastcgi_cache_key "$scheme$request_method$host$request_uri";
fastcgi_cache_valid 200 301 302 10m;
fastcgi_cache_use_stale error timeout updating invalid_header http_500;
While page caching handles full HTML pages, object caching targets database queries and API calls. WordPress’s Object Cache API stores results of frequently requested database queries in memory (e. g. , using Redis or Memcached), preventing the need to hit the database for the same data repeatedly. This is particularly vital for dynamic sites, WooCommerce stores, or sites with complex custom queries, where page caching might be less effective due to personalized content. Implementing Redis or Memcached can reduce database query times by 80-90% for repeated queries. For example, if a WooCommerce product page makes 30 database queries, object caching can serve 25 of those directly from RAM, significantly reducing PHP execution time. You enable this by installing a Redis/Memcached server on your host and configuring WordPress (often via a plugin like Redis Object Cache or by modifying wp-config. php).
// Example Redis Object Cache configuration in wp-config. php
define('WP_CACHE', true);
define('WP_REDIS_HOST', '127. 0. 0. 1');
define('WP_REDIS_PORT', 6379);
// ... other Redis settings
This client-side caching instructs the user’s browser to store static assets (images, CSS, JS, fonts) locally. When the user revisits your site or navigates to another page, these assets are loaded from their local disk cache instead of being re-downloaded from the server. This dramatically improves repeat visit load times. Browser caching is controlled via HTTP headers like Expires and Cache-Control. Most caching plugins configure this automatically, or you can manually add rules to your server’s. htaccess file (for Apache) or Nginx configuration. While it doesn’t improve first-time visits, it’s crucial for user experience and reducing server load on subsequent visits.
# Example. htaccess rules for browser caching
<IfModule mod_expires. c> ExpiresActive On ExpiresByType image/jpg "access plus 1 year" ExpiresByType image/jpeg "access plus 1 year" ExpiresByType image/gif "access plus 1 year" ExpiresByType image/png "access plus 1 year" ExpiresByType text/css "access plus 1 month" ExpiresByType application/javascript "access plus 1 month"
</IfModule>
Optimizing Assets: Images, CSS and JavaScript
Client-side asset optimization is critical for improving perceived performance and achieving good Core Web Vitals scores, especially LCP and FID. Large, unoptimized images, render-blocking CSS. heavy JavaScript files are common culprits that can severely hinder a site’s speed. Effectively managing these assets is a key step to fix slow WordPress issues on the user’s browser.
Images typically account for the largest portion of a page’s weight. Unoptimized images directly impact LCP and overall page load time.
- Compression
- Always compress images. Lossy compression (e. g. , JPEG quality 70-80) offers significant file size reduction with minimal visual quality loss. Lossless compression is suitable for images requiring pixel-perfect fidelity. Plugins like Smush, EWWW Image Optimizer, or ShortPixel can automate this upon upload.
- Modern Formats
- Convert images to modern formats like WebP. WebP images are 25-35% smaller than comparable JPEG or PNG files. Browsers like Chrome, Firefox, Edge. Safari widely support WebP. You can serve WebP using plugins or server configurations (e. g. , Nginx’s map directive). For example, a 1MB JPEG could become a 300KB WebP, saving 700KB per image.
- Responsive Images (srcset)
- Serve images at appropriate dimensions for the user’s device. WordPress automatically generates multiple image sizes. the srcset attribute (e. g. ,
 ) allows browsers to pick the most suitable size, preventing larger images from loading on smaller screens.
 - Lazy Loading
- Defer loading of “below-the-fold” images and iframes until they enter the viewport. This reduces initial page weight and improves LCP. WordPress 5. 5+ includes native lazy loading. But, never lazy load your hero image or any image within the initial viewport, as this will negatively impact LCP.
- Minification and Concatenation
- Remove unnecessary characters (whitespace, comments) from CSS files and combine multiple CSS files into one to reduce file size and HTTP requests. Plugins like Autoptimize or WP Rocket handle this.
- Critical CSS
- Extract the minimum CSS required to render the “above-the-fold” content and inline it directly into the HTML. This allows the page to display visually before the main CSS file loads, improving perceived performance and LCP. The rest of the CSS can be loaded asynchronously. This is an advanced technique, often automated by specialized plugins or build tools.
- Remove Unused CSS
- Large themes and page builders often load significant amounts of CSS that aren’t used on a given page. Tools like PurifyCSS or plugins like Asset CleanUp Pro can identify and remove unused CSS, significantly reducing file size. This can be complex, as dynamic elements might use CSS only under certain conditions.
- Minification and Concatenation
- Similar to CSS, minify and combine JavaScript files.
- Defer/Async Loading
- Use defer or async attributes for JavaScript tags to prevent them from blocking HTML parsing. async scripts execute as soon as they are loaded, potentially out of order. defer scripts execute in order after the HTML is parsed but before the DOMContentLoaded event. Generally, defer is preferred for scripts that modify the DOM.
<script src="script. js" defer></script> <script src="analytics. js" async></script>- Reduce Render-Blocking JS
- Identify and eliminate JavaScript that blocks initial page rendering. Place scripts at the end of the tag or use defer/async.
- Remove Unused JS
- Audit plugins and themes for JavaScript files that aren’t necessary for specific pages. Asset CleanUp Pro can help unload scripts on a per-page basis.
A CDN distributes your site’s static assets (images, CSS, JS, fonts) across a global network of edge servers. When a user requests your site, these assets are served from the closest edge server, reducing latency (the time it takes for data to travel). This significantly improves loading speeds for geographically diverse audiences. For example, if your server is in New York and a user is in London, a CDN serves assets from a London-based edge server, cutting latency from perhaps 150ms to 20ms. Popular CDNs include Cloudflare, KeyCDN, StackPath. Bunny. net. While Cloudflare offers a robust free tier, premium CDNs often provide more advanced features like image optimization, WebP conversion. WAF (Web Application Firewall) services.
Database and Code Hygiene: Preventing Bloat and Inefficiency
A neglected WordPress database and inefficient code are silent killers of website performance. Over time, the database accumulates cruft. poorly written plugins or themes can introduce significant overhead. Addressing these often overlooked areas is crucial to maintain a lean, fast-performing WordPress site and effectively fix slow WordPress issues that stem from the backend.
- Post Revisions
- WordPress stores multiple revisions of posts and pages, which can quickly bloat the wp_posts table. While useful for recovery, an excessive number can slow down queries. Limiting revisions (e. g. , to 3-5 per post) or disabling them entirely is a common practice. You can do this by adding a constant to your wp-config. php file:
define('WP_POST_REVISIONS', 5); // Limit to 5 revisions // Or to disable completely: // define('WP_POST_REVISIONS', false);- Transients
- Plugins often use the Transients API to cache temporary data. But, expired or orphaned transients can persist in the wp_options table, making it unnecessarily large and slowing down autoload queries. Regular cleanup is recommended.
- Spam Comments & Trash
- Delete spam comments, unapproved comments. items in the trash regularly. Each entry adds to database size.
- Orphaned Data
- When plugins or themes are uninstalled, they sometimes leave behind data in the database (e. g. , custom tables, options). Identifying and manually cleaning this can be complex and requires database expertise.
- Database Optimization
- Run OPTIMIZE TABLE on your tables periodically. This defragments the database, reclaiming space and improving query performance. Many plugins (e. g. , WP-Optimize) offer this functionality. For advanced users, analyzing slow queries using MySQL’s EXPLAIN statement can pinpoint exact bottlenecks within queries themselves, suggesting where indexes might be missing or where query structure could be improved.
- Identify Resource Hogs
- Not all plugins are created equal. Some are lightweight, while others introduce significant overhead through numerous database queries, external scripts, or inefficient code. Use Query Monitor to identify plugins making excessive queries or consuming too much memory/CPU.
- Necessity vs. Performance
- Evaluate every active plugin. Does it genuinely add value that outweighs its performance cost? Replace functionality where possible with custom code or lighter alternatives. For example, a complex social sharing plugin might be replaced by simple sharing links.
- Theme Choice
- Choose a lightweight, well-coded theme. Themes like GeneratePress, Astra, Kadence, or Neve are known for their performance-first approach, often achieving LCP under 1 second out-of-the-box, compared to feature-heavy themes that can hit 3-4 seconds. Avoid bloated themes with excessive features you don’t use, as they often load unnecessary CSS and JavaScript.
- Staging Environment
- Always test new plugins or theme updates in a staging environment. This allows you to measure their performance impact and check for compatibility issues before deploying to your live site.
- Transients API for Custom Queries
- If you have custom code that performs complex or frequent database queries, cache the results using the Transients API. This prevents repeated execution of expensive queries.
$my_custom_data = get_transient( 'my_custom_data_cache' ); if ( false === $my_custom_data ) { // Data not found in cache, fetch it $my_custom_data = $wpdb->get_results( "SELECT FROM {$wpdb->prefix}my_custom_table WHERE status = 'active' LIMIT 10" ); set_transient( 'my_custom_data_cache', $my_custom_data, HOUR_IN_SECONDS 6 ); // Cache for 6 hours } // Use $my_custom_data- Efficient Loops
- Avoid inefficient loops and unnecessary database calls within loops. Minimize the number of times get_post_meta() or get_option() are called in a single request.
- Profiling
- For complex custom code, use PHP profiling tools like Xdebug or Blackfire. io to identify bottlenecks in your code execution paths.
Advanced Performance Tweaks and Monitoring
Once fundamental optimizations are in place, advanced tweaks can further refine performance, shaving off crucial milliseconds and improving user experience. Consistent monitoring is then essential to ensure these gains are maintained and to quickly identify any new regressions, especially if your goal is to perpetually fix slow WordPress instances.
- HTTP/2
- Most modern web servers (Nginx, Apache with mod_http2) and browsers support HTTP/2. This protocol significantly improves performance by allowing multiple requests and responses to be sent concurrently over a single TCP connection (multiplexing), instead of the sequential processing of HTTP/1. 1. It also introduces header compression and server push. Ensure your server is configured for HTTP/2 (requires SSL/TLS).
- HTTP/3 (QUIC)
- The latest iteration, HTTP/3, uses UDP-based QUIC protocol instead of TCP. It offers even faster connection establishment (0-RTT), improved congestion control. eliminates head-of-line blocking at the transport layer. While still gaining widespread adoption, supporting HTTP/3 (if your CDN or hosting provider offers it) can provide an additional performance edge, particularly on unstable networks.
These directives tell the browser to perform certain actions proactively, improving resource loading times.
- <link rel=”preload”>
- Informs the browser to fetch a critical resource (e. g. , hero image, custom font, critical CSS) as soon as possible, even before it’s discovered in the HTML parser. This is extremely effective for improving LCP. For example, preloading a large background image for your hero section can reduce its loading time by hundreds of milliseconds.
<link rel="preload" href="/path/to/hero-image. jpg" as="image"> <link rel="preload" href="/path/to/custom-font. woff2" as="font" type="font/woff2" crossorigin>- <link rel=”preconnect”>
- Establishes an early connection to another domain (e. g. , a CDN, Google Fonts, analytics scripts) that hosts critical assets. This performs the DNS lookup, TCP handshake. TLS negotiation in advance, saving valuable time when the actual resource is requested.
<link rel="preconnect" href="https://fonts. googleapis. com"> <link rel="preconnect" href="https://cdn. example. com" crossorigin>- <link rel=”dns-prefetch”>
- A less impactful but still useful hint to perform DNS lookups for domains you expect to connect to. It’s often used as a fallback for browsers that don’t support preconnect.
The Heartbeat API allows real-time communication between the browser and the server. It’s used for features like auto-saves, post locking. real-time plugin notifications. By default, it sends requests every 15-60 seconds, which can create unnecessary server load, especially if you have many users logged into the admin area. You can control its frequency or disable it in specific areas using plugins (e. g. , Heartbeat Control) or by adding code to your functions. php:
/ Control Heartbeat API frequency. /
function my_custom_heartbeat_settings() { wp_deregister_script('heartbeat');
}
add_action('init', 'my_custom_heartbeat_settings', 1); // Or change frequency
function my_heartbeat_interval( $settings ) { $settings['interval'] = 60; // 60 seconds return $settings;
}
add_filter( 'heartbeat_settings', 'my_heartbeat_interval' );
Performance optimization is an ongoing process, not a one-time task.
- Uptime Monitoring
- Use services like UptimeRobot or StatusCake to monitor your site’s availability and response time. Set up alerts for downtime or slow responses.
- Performance Trend Tracking
- Regularly run PageSpeed Insights, GTmetrix, or WebPageTest and track your scores over time. Tools like Google Search Console’s Core Web Vitals report provide real user data (RUM) that reflects actual performance experienced by your visitors.
- Server Resource Monitoring
- Keep an eye on your server’s CPU, RAM. disk I/O usage. Most hosting providers offer dashboards for this. Spikes can indicate a performance bottleneck or an attack.
- Staging Environments
- Always implement and test significant changes (theme updates, new plugins, PHP upgrades) in a staging environment first. This prevents breaking your live site and allows you to measure performance impacts in isolation before deployment.
Embracing Modern Web Technologies: Beyond Traditional Optimizations
To truly future-proof your WordPress site and maintain peak performance, it’s essential to look beyond conventional optimization techniques and adopt modern web technologies. These advancements not only enhance speed but also improve security and user experience across diverse devices and network conditions. This proactive approach ensures your efforts to fix slow WordPress sites remain effective in a rapidly evolving web landscape.
While srcset and sizes provide responsive images, Client Hints offer a more advanced mechanism. Client Hints are HTTP request headers that allow the server to dynamically select and serve the most appropriate image asset based on the user’s device characteristics (e. g. , DPR, viewport width, network speed). For example, a browser might send a Sec-CH-UA-DPR: 2. 0 header, indicating a device pixel ratio of 2. 0, allowing the server to serve a higher-resolution image. This offloads the decision-making from the browser to the server and can be more precise than srcset. To enable client hints, you add a tag or HTTP header:
<meta http-equiv="Accept-CH" content="DPR, Width, Viewport-Width">
But, implementing this effectively requires server-side logic to process these headers and serve appropriate images, often integrated with a CDN or a custom image optimization service. The trade-off is increased server complexity for highly tailored image delivery.
JavaScript execution can be a major cause of FID issues and overall page unresponsiveness, especially for complex animations, heavy data processing, or third-party scripts. Web Workers allow you to run scripts in a background thread, separate from the main execution thread that handles the UI. This prevents long-running scripts from blocking the user interface, ensuring a smooth and responsive experience. For example, if your WordPress site has a complex client-side search filter or an interactive data visualization, running the computation in a Web Worker can prevent UI freezes. While not directly integrated into WordPress core, custom theme or plugin development can leverage Web Workers for specific, heavy client-side tasks. The challenge lies in managing communication between the main thread and the worker, as they cannot directly access the DOM.
// Example: main. js
if (window. Worker) { const myWorker = new Worker('worker. js'); myWorker. postMessage({ data: 'some heavy computation' }); myWorker. onmessage = function(e) { console. log('Message received from worker:', e. data); };
} // Example: worker. js
onmessage = function(e) { console. log('Message received in worker:', e. data); // Perform heavy computation const result = e. data. length 1000; postMessage(result);
};
Service Workers are powerful client-side proxies that sit between your web application and the network. They enable advanced caching strategies (beyond simple browser caching) and provide offline capabilities, making your WordPress site behave more like a native app.
- Offline-First Experience
- Service Workers can cache your site’s static assets and even dynamic content (e. g. , blog posts) so users can browse your site even when they are offline or on a poor network connection. This dramatically improves reliability and perceived speed.
- Granular Caching Control
- They offer fine-grained control over how network requests are handled, allowing for strategies like “cache-first, then network,” “network-first, then cache,” or “stale-while-revalidate.” This can significantly reduce load times on repeat visits.
- Push Notifications
- Service Workers also power web push notifications, providing a direct channel to re-engage users.
Implementing Service Workers requires careful planning and typically involves a manifest file and JavaScript code to register and manage the worker. Plugins like SuperPWA can help integrate basic Service Worker functionality for WordPress, turning your site into a Progressive Web App (PWA). But, for complex caching strategies or specific offline experiences, custom development is often necessary. Trade-offs include increased complexity in cache management and debugging, as well as the need for HTTPS.
For highly dynamic or resource-intensive sections of your WordPress site (e. g. , custom search, complex calculations, API integrations), offloading these tasks to serverless functions (like AWS Lambda, Google Cloud Functions, or Azure Functions) can provide significant performance and scalability benefits. Instead of burdening your WordPress server, these functions execute on demand, scale automatically. you only pay for compute time used. This can drastically reduce the load on your main WordPress instance, improving its overall responsiveness and TTFB. For instance, a bespoke user dashboard pulling data from multiple external APIs could be powered by a serverless function, with WordPress merely displaying the results. This approach decouples your heavy computations from your core WordPress site, allowing each to scale independently. The challenge lies in integrating these functions securely and efficiently with WordPress via its REST API or custom endpoints.
Verification and Testing Methodology: Ensuring Sustained Performance
The journey to fix a slow WordPress site is incomplete without a rigorous methodology for verifying and continuously monitoring the impact of your optimizations. Implementing changes without measuring their effect is akin to driving blind. A structured approach to testing ensures that performance gains are real, sustained. that no new regressions are introduced.
Before making any changes, capture comprehensive performance metrics of your current site. This baseline is your reference point.
- Tools
- Use Google PageSpeed Insights, Lighthouse (via Chrome DevTools or CLI), GTmetrix. WebPageTest. Run tests multiple times (e. g. , 3-5 times) and take the median to account for network variability.
- Metrics to Record
- LCP, FID, CLS, TTFB, Total Blocking Time (TBT), Speed Index, Time to Interactive (TTI), fully loaded time. total page size/requests.
- Conditions
- Test from a consistent geographical location, device type (desktop/mobile). network speed (e. g. , simulated 3G for mobile). WebPageTest allows precise control over these.
- One Change at a Time
- Implement one optimization at a time. This allows you to isolate the impact of each change. For example, first optimize images, then re-measure. Then implement caching. re-measure.
- Staging Environment
- Always perform changes and testing on a staging or development environment identical to your production server. This prevents downtime or issues on your live site.
- Re-measure
- After each change, repeat the baseline measurement process. Compare the new metrics against your previous readings. Quantify the improvement (e. g. , “LCP improved by 0. 5s,” “page size reduced by 20%”).
- Assess Waterfall Charts
- Pay close attention to waterfall charts from GTmetrix or WebPageTest. Look for changes in resource loading order, reduced blocking times. faster asset delivery. A successful optimization should show a noticeable reduction in the duration of specific requests or a shift in render-blocking resources.
- Query Monitor
- As discussed, this plugin is invaluable for debugging database queries and PHP execution. Look for spikes in query times after installing new plugins or themes.
- Browser DevTools (Network Tab)
- This is your window into client-side performance.
- Disable Cache
- Throttling
- Blocking Requests
- PHP Error Logs
- Check your server’s PHP error logs (e. g. , error. log) for any errors or warnings that might indicate inefficient code or resource consumption. Enabling WP_DEBUG in wp-config. php can also reveal issues.
define( 'WP_DEBUG', true ); define( 'WP_DEBUG_LOG', true ); // Logs errors to wp-content/debug. log define( 'WP_DEBUG_DISPLAY', false ); // Don't display errors on screen- Server Logs
- Access logs can show unusual traffic patterns or heavy requests, while error logs can pinpoint server-side issues (e. g. , MySQL errors, PHP memory limits).
Always test with the browser cache disabled to simulate a first-time visitor.
Simulate slower network conditions (e. g. , 3G, 4G) to interpret how your site performs for users with less-than-ideal connections.
Temporarily block specific scripts or stylesheets to see their impact on rendering. This helps identify render-blocking resources.
- Real User Monitoring (RUM)
- Tools like Google Analytics (with site speed reports), Google Search Console (Core Web Vitals report), or dedicated RUM services (e. g. , Raygun, New Relic) collect data from actual user interactions. This provides the most accurate picture of real-world performance.
- Synthetic Monitoring
- Tools like UptimeRobot (for simple checks) or more advanced APM (Application Performance Monitoring) solutions (e. g. , New Relic, Datadog) can simulate user visits at regular intervals and alert you to performance regressions before your users even notice.
- Set Thresholds
- Define acceptable performance thresholds (e. g. , LCP < 2. 0s, TTFB < 300ms) and configure alerts when these are breached. This proactive approach is key to maintaining a fast WordPress site over time.
Conclusion
Having delved into the intricate mechanisms governing WordPress performance, it’s clear that true speed optimization extends far beyond superficial fixes. The journey from a sluggish site to one delivering sub-2. 5s LCP or a <100ms FID on mobile requires a persistent, data-driven methodology, scrutinizing everything from HTTP/2 push strategies to DOM tree complexity and server-level opcode caching. My personal insight is that the most sustainable gains emerge from understanding the critical rendering path and its real-world implications, iteratively testing changes with tools like WebPageTest and Lighthouse while always acknowledging the trade-offs inherent in any architectural decision. This isn’t a one-time task but a continuous commitment to enhancing user experience and, by extension, your digital presence. Embrace this technical rigor; it’s the definitive path to unlocking unparalleled website speed and maintaining a competitive edge.
More Articles
The Complete Roadmap to Building a Thriving Content Marketing Strategy
Your Essential Checklist for Choosing the Right CMS Platform
7 Actionable Steps to Build Topical Authority for Better Search Rankings
How to Attract More Customers Online with Simple Digital Marketing Tactics
FAQs
Why is my WordPress site so sluggish?
There are several common culprits! It could be anything from cheap hosting, too many unoptimized images, a bloated theme, or a pile of unnecessary plugins. Sometimes it’s even an outdated PHP version or a database that needs some spring cleaning.
Does my web host really matter for site speed?
Absolutely, your web host is foundational! A slow or underpowered host can bottleneck everything else you do. Opting for a reputable host with good server resources, like managed WordPress hosting or a VPS, can make a huge difference in loading times.
How can I make my images load faster on WordPress?
Images are often the biggest culprits for slow pages. Always compress your images before uploading them and consider using next-gen formats like WebP. There are also great WordPress plugins that can automatically optimize and lazy-load images, meaning they only load when a user scrolls to them.
What’s the deal with plugins and themes slowing things down?
Think of plugins and themes like apps on your phone – too many, or poorly coded ones, can hog resources. Try to use a lightweight theme and only install essential plugins. Regularly review and delete any unused plugins and always choose well-coded, reputable ones.
Is caching vital for speeding up WordPress?
Extremely crucial! Caching saves a static version of your site so the server doesn’t have to build it from scratch every time someone visits. This dramatically reduces server load and speeds up delivery to your visitors. Install a good caching plugin like WP Rocket or LiteSpeed Cache.
My site’s old, what about the database and PHP version?
An old, bloated database can definitely slow things down. Use a plugin to regularly optimize and clean up your database (remove old revisions, spam comments, etc.). Also, make sure your WordPress site is running on the latest stable PHP version, as newer versions offer significant performance improvements.
Should I use a CDN for my WordPress site?
If you have a global audience or even just want better reliability, absolutely! A Content Delivery Network (CDN) stores copies of your site’s static files (images, CSS, JS) on servers worldwide. When a user visits your site, these files are delivered from the closest server, reducing latency and speeding up load times.